

Your Klaviyo email templates are more than just a placeholder for content. They can be your way to nail the way you communicate your products or services to the world. Of course, provided they are well-designed. And when they are, they help you create a repeatable email design system. The system that you can rely on to save hours and be loyal to your brand consistency.
From minimalistic HTML email templates to heavily-designed ones that scream “professional designer, “Klaviyo email templates run the gamut of email designs. The beauty is that you can start simple and level up as you go.
In this blog, we’ll walk you through the step-by-step account of creating and customizing Klaviyo email templates into high-converting marketing emails for your brand.
How To Build Klaviyo Email Templates Using Drag-and-Drop Klaviyo Email Builder
If you’ve ever looked into customizable email templates, you’ve probably heard about Klaviyo HTML email templates. There’s a reason it’s crowned the best email marketing tool of 2025. Beyond its powerful automated workflows, Klaviyo offers an extensive library of data-backed templates and intuitive design tools that make the rest of us look like email design pros.
Klaviyo has a library packed with hundreds of pre-built, customizable email templates that let you quickly build customer journeys. You can either design custom HTML email templates (if you’re feeling fancy) or use the drag-and-drop editor to customize pre-built templates and jump-start your email production.
Now, it’s time to explore how to use the Klaviyo email template editor to create eye-catching and polished email templates. Here’s a detailed walkthrough on how to build your Klaviyo email templates from start to finish:
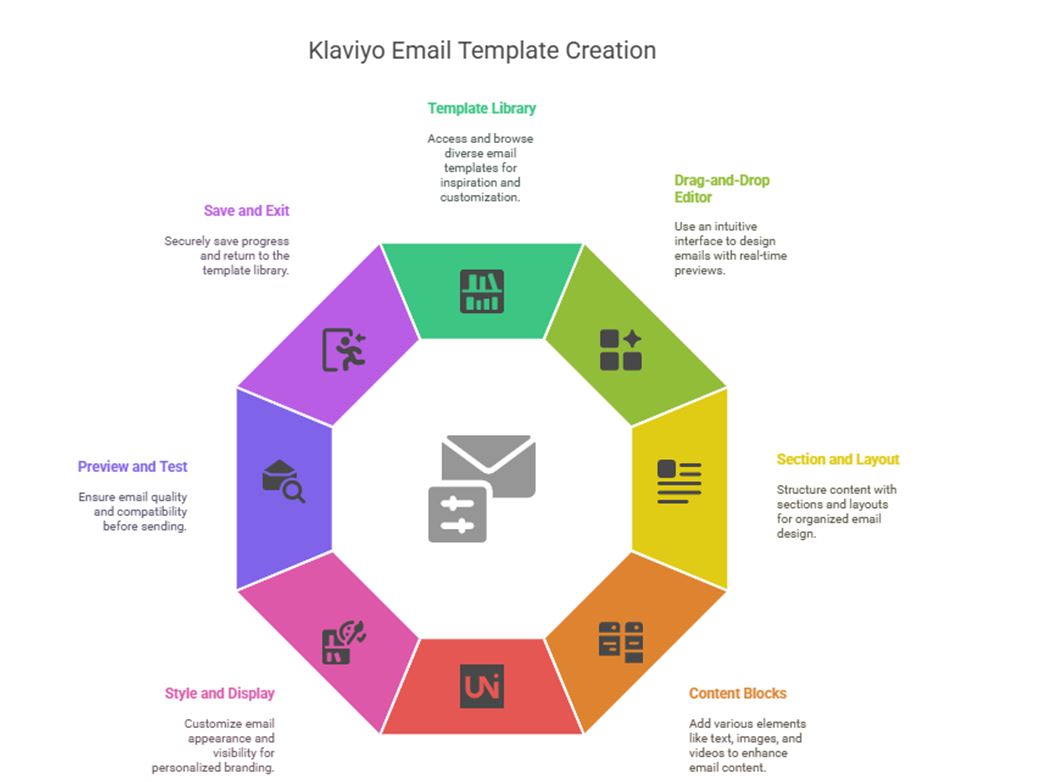
Step 1: Access The Template Library
- Log in to your Klaviyo account, head to the Content tab, and select Templates.
- Browse through Klaviyo’s template collection using the search bar or filters (template type, layout, seasonality).
- Find a template you like and click “Use Template,” or start fresh with “Create blank email” if you feel more creative.
Step 2: Navigate To The Drag-and-Drop Editor Interface
- The left menu contains all your content blocks and style settings – think of it as your toolbox.
- The right pane shows a live preview that updates as you make changes in real time.
- Use the Desktop/Mobile toggle to check how your email looks on different devices.
- The undo and redo buttons at the top left are your safety net for when that brilliant design idea turns out… less brilliant.
Step 3: Structure Your Klaviyo Email Template with Sections and Layouts
- In Klaviyo’s template editor, all your content is grouped into sections. Use sections to group elements and move them as a unit within your email.
- When you first open a template, you’ll already see some sections in place. To adjust a section’s settings (not the content inside), click just to the right or left of its content. Clicking directly on a text block or image only opens that specific element’s settings.
- Each section has two main options: Styles and Display.
- With the Styles tab, you customize the look of that section. Such as adding a background image or changing the padding. The Display tab helps you control which devices or recipients will see that section.
- Here’s a little-known style tip: Template styles apply first, but section styles override template styles, and block styles override section styles. It’s like a style hierarchy – each level gets more specific and takes priority.
- With layout, it’s easy to design a cluster of elements and then move them all together within a container.
- There are three popular layout blocks in the Klaviyo email builder. Columns, Split block, and Table block.
- In the Column layout, you can add any type of email content in parallel columns. Drag the column button, select up to four columns, choose width, and add content blocks.
- In the Split block layout, you can add text and image content in two columns. Just drag the split block, choose between text, image, or both.
- With the Table blocks, you can add as many columns and rows as you like. You can add it via the Styles tab after dragging the block.
Step 4: Add Content Blocks
This is where the fun begins! Drag and drop different design elements into your layout:
- Drag and drop a variety of blocks-text, images, videos, buttons, social links, review quotes, custom HTML, and product feeds-into your layout.
- Product Block: Choose between a static set (manually selected products) or a dynamic feed (AI-driven personalized recommendations) to match your campaign goals.
Step 5: Save and Reuse with Universal Content
Found yourself making the same footer over and over? Stop that nonsense! Save frequently used elements as Universal content and reuse them across all your templates.
Once saved, these elements appear in the Universal tab of your email template blocks. You can:
- Access universal content from the content tab
- Drag it into any template
- Edit universal content to update ALL templates using that block.
- Or unlink it to edit independently for one-off changes
This feature alone can save you hours of repetitive work each month.
Step 6: Customize Styles and Display Settings
- Use the Styles tab to set global template styles: background images, spacing, fonts, and colors for consistent branding.
- Click any element to access its specific style and display options. This also includes device-based visibility and show/hide logic for personalized content.
- For example, show loyalty program details only to members, or promote sign-ups to non-members.
Step 7: Preview and Test Your Email
- Click Preview and Test in the upper-right corner to see your email as a specific profile or event.
- Use the email size bar to ensure Gmail won’t clip your message.
- Send a test email to yourself (and maybe a colleague) for a final review before sending.
Step 8: Save And Exit
Your template saves automatically as you work (thank goodness). When finished, just click Exit to return to the template library.
Klaviyo Email Templates Limitations: The Not-So-Pretty Truth
Let’s get real for a second. Klaviyo email templates do pose challenges. They aren’t perfect (nothing is), and you might hit some walls while using them:
First, templates that appear perfect in the Klaviyo email builder sometimes break in finicky email clients like Outlook. And the whole layout looks misaligned.
Second, some Klaviyo email templates fail to adapt to mobile, leading to broken designs.
Third, the built-in editor has limitations. If you’re dreaming of advanced layouts or specific design elements, you might bump into Klaviyo’s limited customization options.
When the stakes are high (major product launch, anyone?), consider custom or modular Klaviyo email templates. Custom templates give you complete control over messaging, ensure consistent performance across email clients, and maintain your brand standards throughout every campaign.
Yes, the drag-and-drop editor is quick and efficient when you’re short on time, budget, or specialized team members. But as Drupalsinh Barad, seasoned project manager at Mavlers, puts it: “If a brand considers email a vital communication channel, custom development is the best option.”
The Bottom Line
Klaviyo email templates are perfect for getting started without a headache. They’ll do the job beautifully while you focus on actually running your business. Then later, when you’ve got more breathing room (and maybe a bigger budget), you can graduate to custom templates that feel like they were made just for you.